Blog
How to Remove Duplicates in Excel: 3 Common Mistakes to Avoid
 Sik Yang · Jan 6, 2026
Duplicate entries are a common problem when merging data from multiple sources or organizing large datasets.
Excel's Remove Duplicates feature can clean up duplicate data with just a few clicks, but incorrect settings can delete necessary information.
Here’s how to use Remove Duplicates correctly, what to avoid, and how to verify results safely.
How to Use Excel's Remove Duplicates Feature
The fastest way to remove duplicates in Excel is to use the built-in feature in the Data tab. This feature has been available since Excel 2007, allowing most users to access it immediately without installing additional programs.
Remove Duplicates from Data Tab
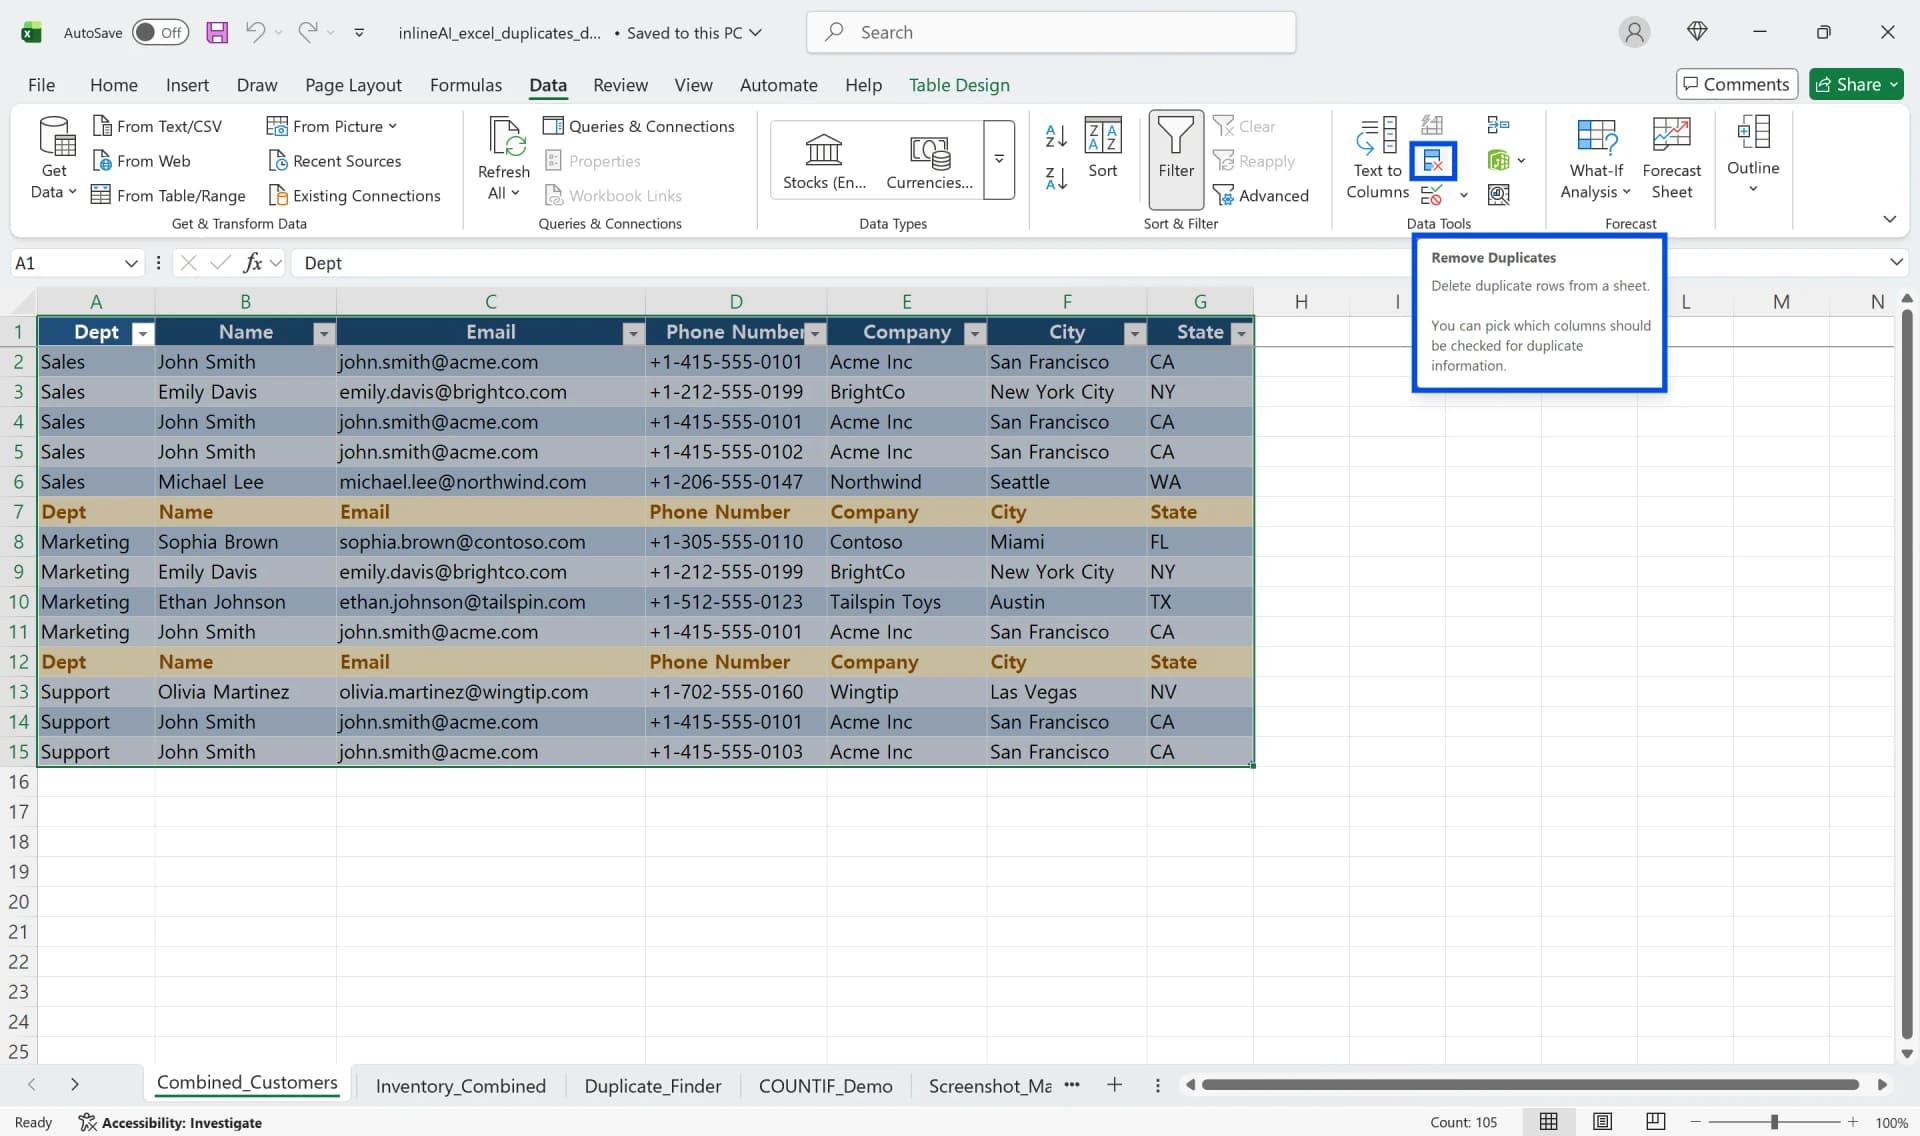
- Drag to select the data range where you want to check for duplicates. To avoid mistakes, select the entire range including the header row.
- Click the Data tab in the top ribbon menu.
- Click the Remove Duplicates button in the Data Tools group.
- When the Remove Duplicates dialog box appears, make sure to check the "My data has headers" option. Check this option to ensure the first row is recognized as headers and won't be deleted.
- Select the columns to use as duplicate criteria. To use all columns as criteria, keep them all selected. To use only specific columns, check only those columns. For example, if you want to treat rows as duplicates only when both Name and Email are identical, check both columns.
- Click OK to execute the duplicate removal.
Check Duplicate Data and Review Deletion Results
When Excel's Remove Duplicates completes, a result message displays showing how many duplicate values were found and removed. For example, you'll see a message like "3 duplicate values found and removed; 7 unique values remain."
This feature modifies the original data directly, so always work on a copy of the sheet.
After removing duplicates, the remaining data maintains its original order, and the first occurrence of duplicate items is preserved while others are deleted.
3 Common Mistakes When Removing Duplicates in Excel
Excel's duplicate removal feature seems simple, but one wrong setting can distort data or delete necessary information.
Mistake 1 - Headers Deleted Due to Unchecked Header Option
The most common mistake is not checking the "My data has headers" option. Without this option checked, the header row is recognized as regular data and becomes subject to deletion.
This is especially problematic when copying and merging multiple files—repeated header rows scattered throughout can be considered duplicate data and disappear entirely.
For example, if you copy sales data from 5 branch offices into one sheet and each block contains header rows like Product Name, Quantity, and Amount, some header rows will disappear during duplicate removal while others remain, causing filter and sort functions to malfunction.
If column names change or unexpected values appear in the first row after removing duplicates, check this setting.
Mistake 2 - Data Loss from Using Only Some Columns as Criteria
In data with Name and Phone Number columns, if you execute Remove Duplicates using only Name as the criterion, only the first row among people with the same name remains while others are deleted.
Since the Phone Number column is also deleted along with the row, even though the phone numbers were actually different, only the first phone number survives and the rest of the information disappears, causing data loss.
Practically, if there are three entries for John Smith with different phone numbers, when removing duplicates based on Name only, only the first John Smith's phone number remains and the other two are completely deleted.
If you check for duplicates in a specific column using Excel functions or Conditional Formatting, but then check multiple columns in Remove Duplicates, the duplicates shown on screen and the rows actually deleted will differ, creating confusion.
When handling multi-column data, first define whether to remove duplicates based on one column only or remove only completely identical rows using multiple column combinations, then select the checkboxes accordingly.
Mistake 3 - Deleting Without Backing Up Original Data
Excel's Remove Duplicates feature deletes data immediately. While Ctrl+Z can undo the operation during the same session, closing and reopening the file makes recovery impossible.
This is especially problematic if you removed duplicates from thousands of rows with the wrong criteria, since identifying exactly what was deleted becomes difficult after the fact.
Copying the sheet or backing up the file itself before working allows you to return to the original data if problems occur.
The safest method is to right-click the sheet tab, select Move or Copy to duplicate the sheet, and then work on the copy.
Find Duplicates in Excel Using Conditional Formatting
If you want to check which data is duplicated before deleting, using Conditional Formatting is recommended.
Conditional Formatting only displays duplicates with colors without deleting data, allowing you to safely check for duplicate data.
Apply Duplicate Values Rule
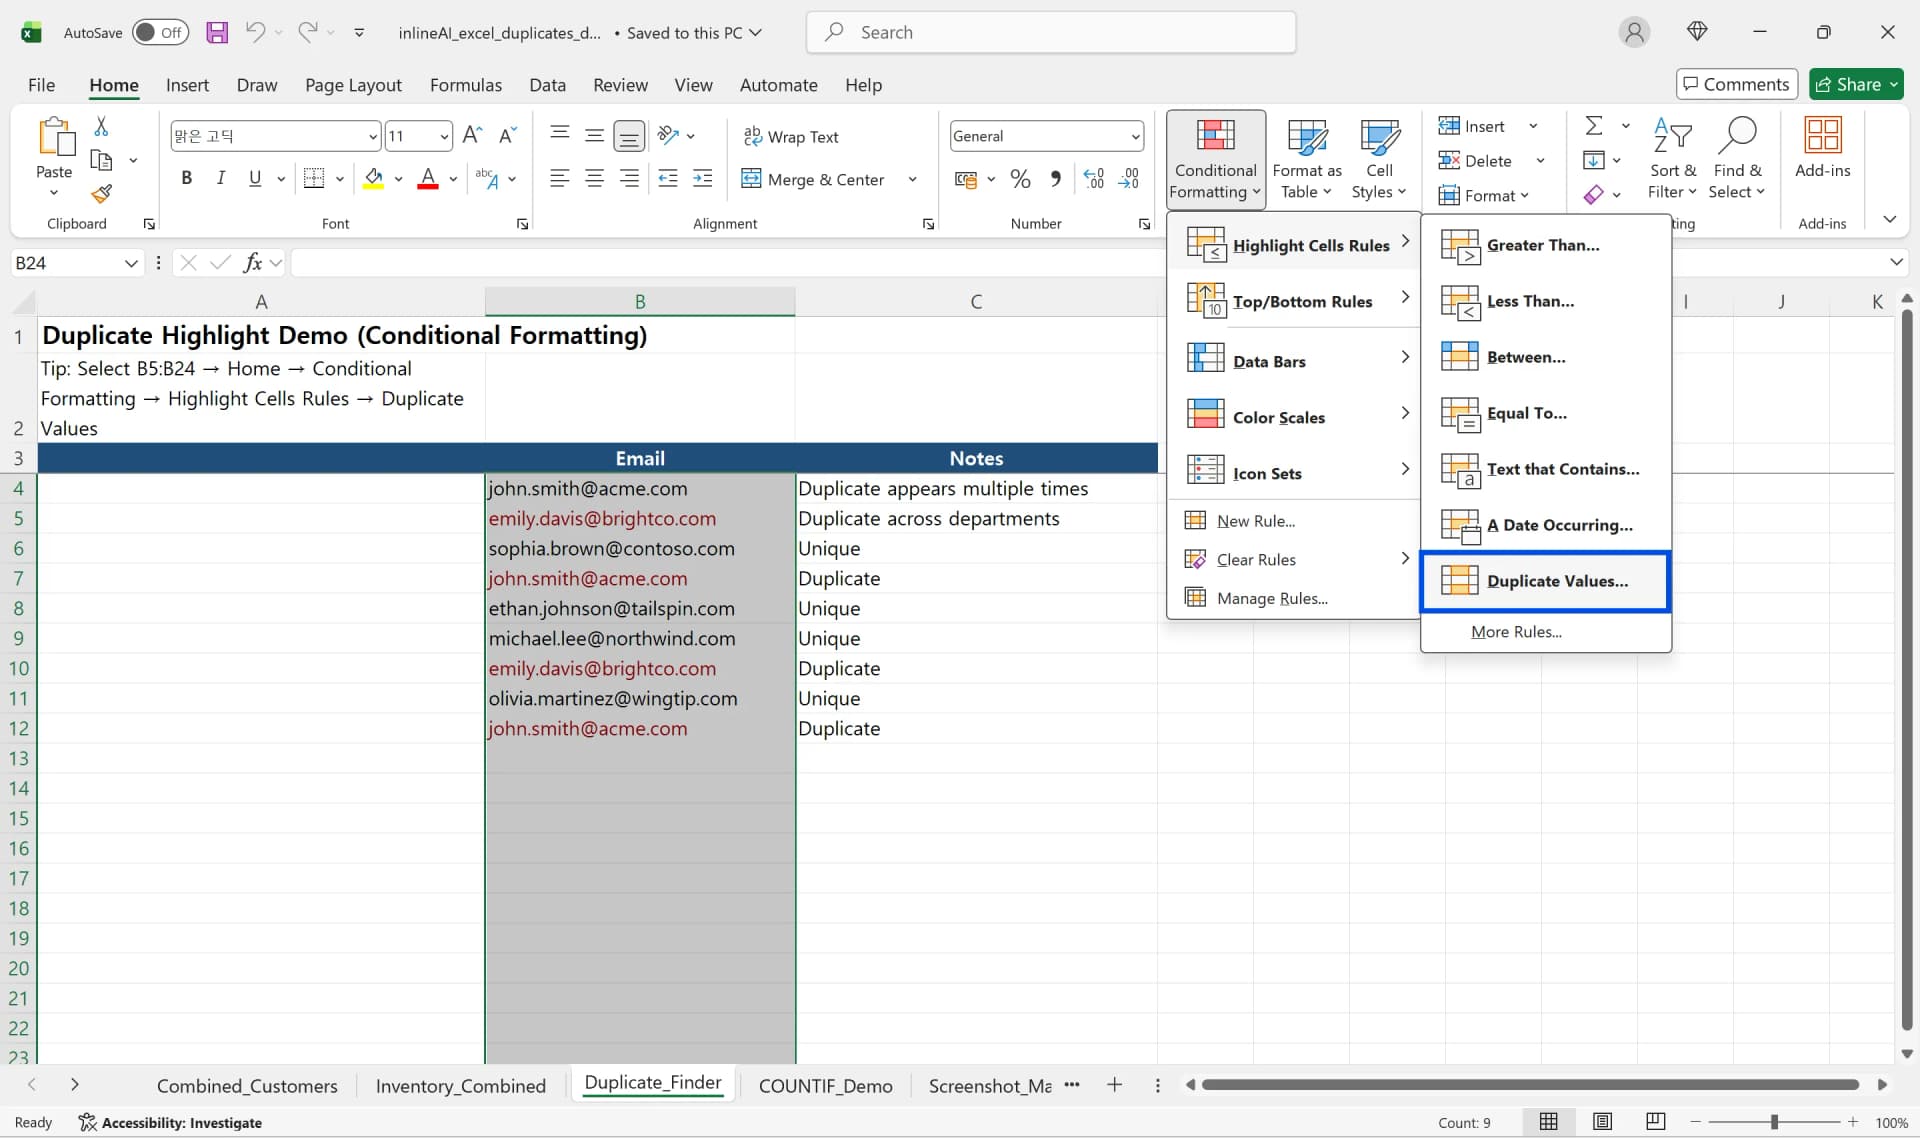
- Select the cell range where you need to check for duplicate data.
- Click the Conditional Formatting button in the Home tab.
- Select Duplicate Values from Highlight Cells Rules.
- When the Duplicate Values settings window appears, verify that the first box is selected as "Duplicate."
- Select your desired color from the formatting options or specify it directly with Custom Format. The default option provides Light Red Fill with Dark Red Text, but you can change to other colors like yellow or blue.
- Click OK to display duplicates with color.
Instantly Verify Duplicates with Color
Conditional Formatting applies in real-time, so the formatting immediately disappears when you delete one of the duplicate data entries. This allows you to visually verify your progress while finding duplicates in Excel. This helps you see how many times each value appears before deleting anything. After verifying duplicates marked with color, you can use the Filter function to sort by color and view only the duplicate data together.
Count Duplicate Values with Excel Functions
Besides displaying duplicates with Conditional Formatting, you can also count how many times each item is duplicated using Excel formulas. This method is useful for data analysis as it clearly shows duplicate counts as numbers.
How to Write COUNTIF Excel Formula
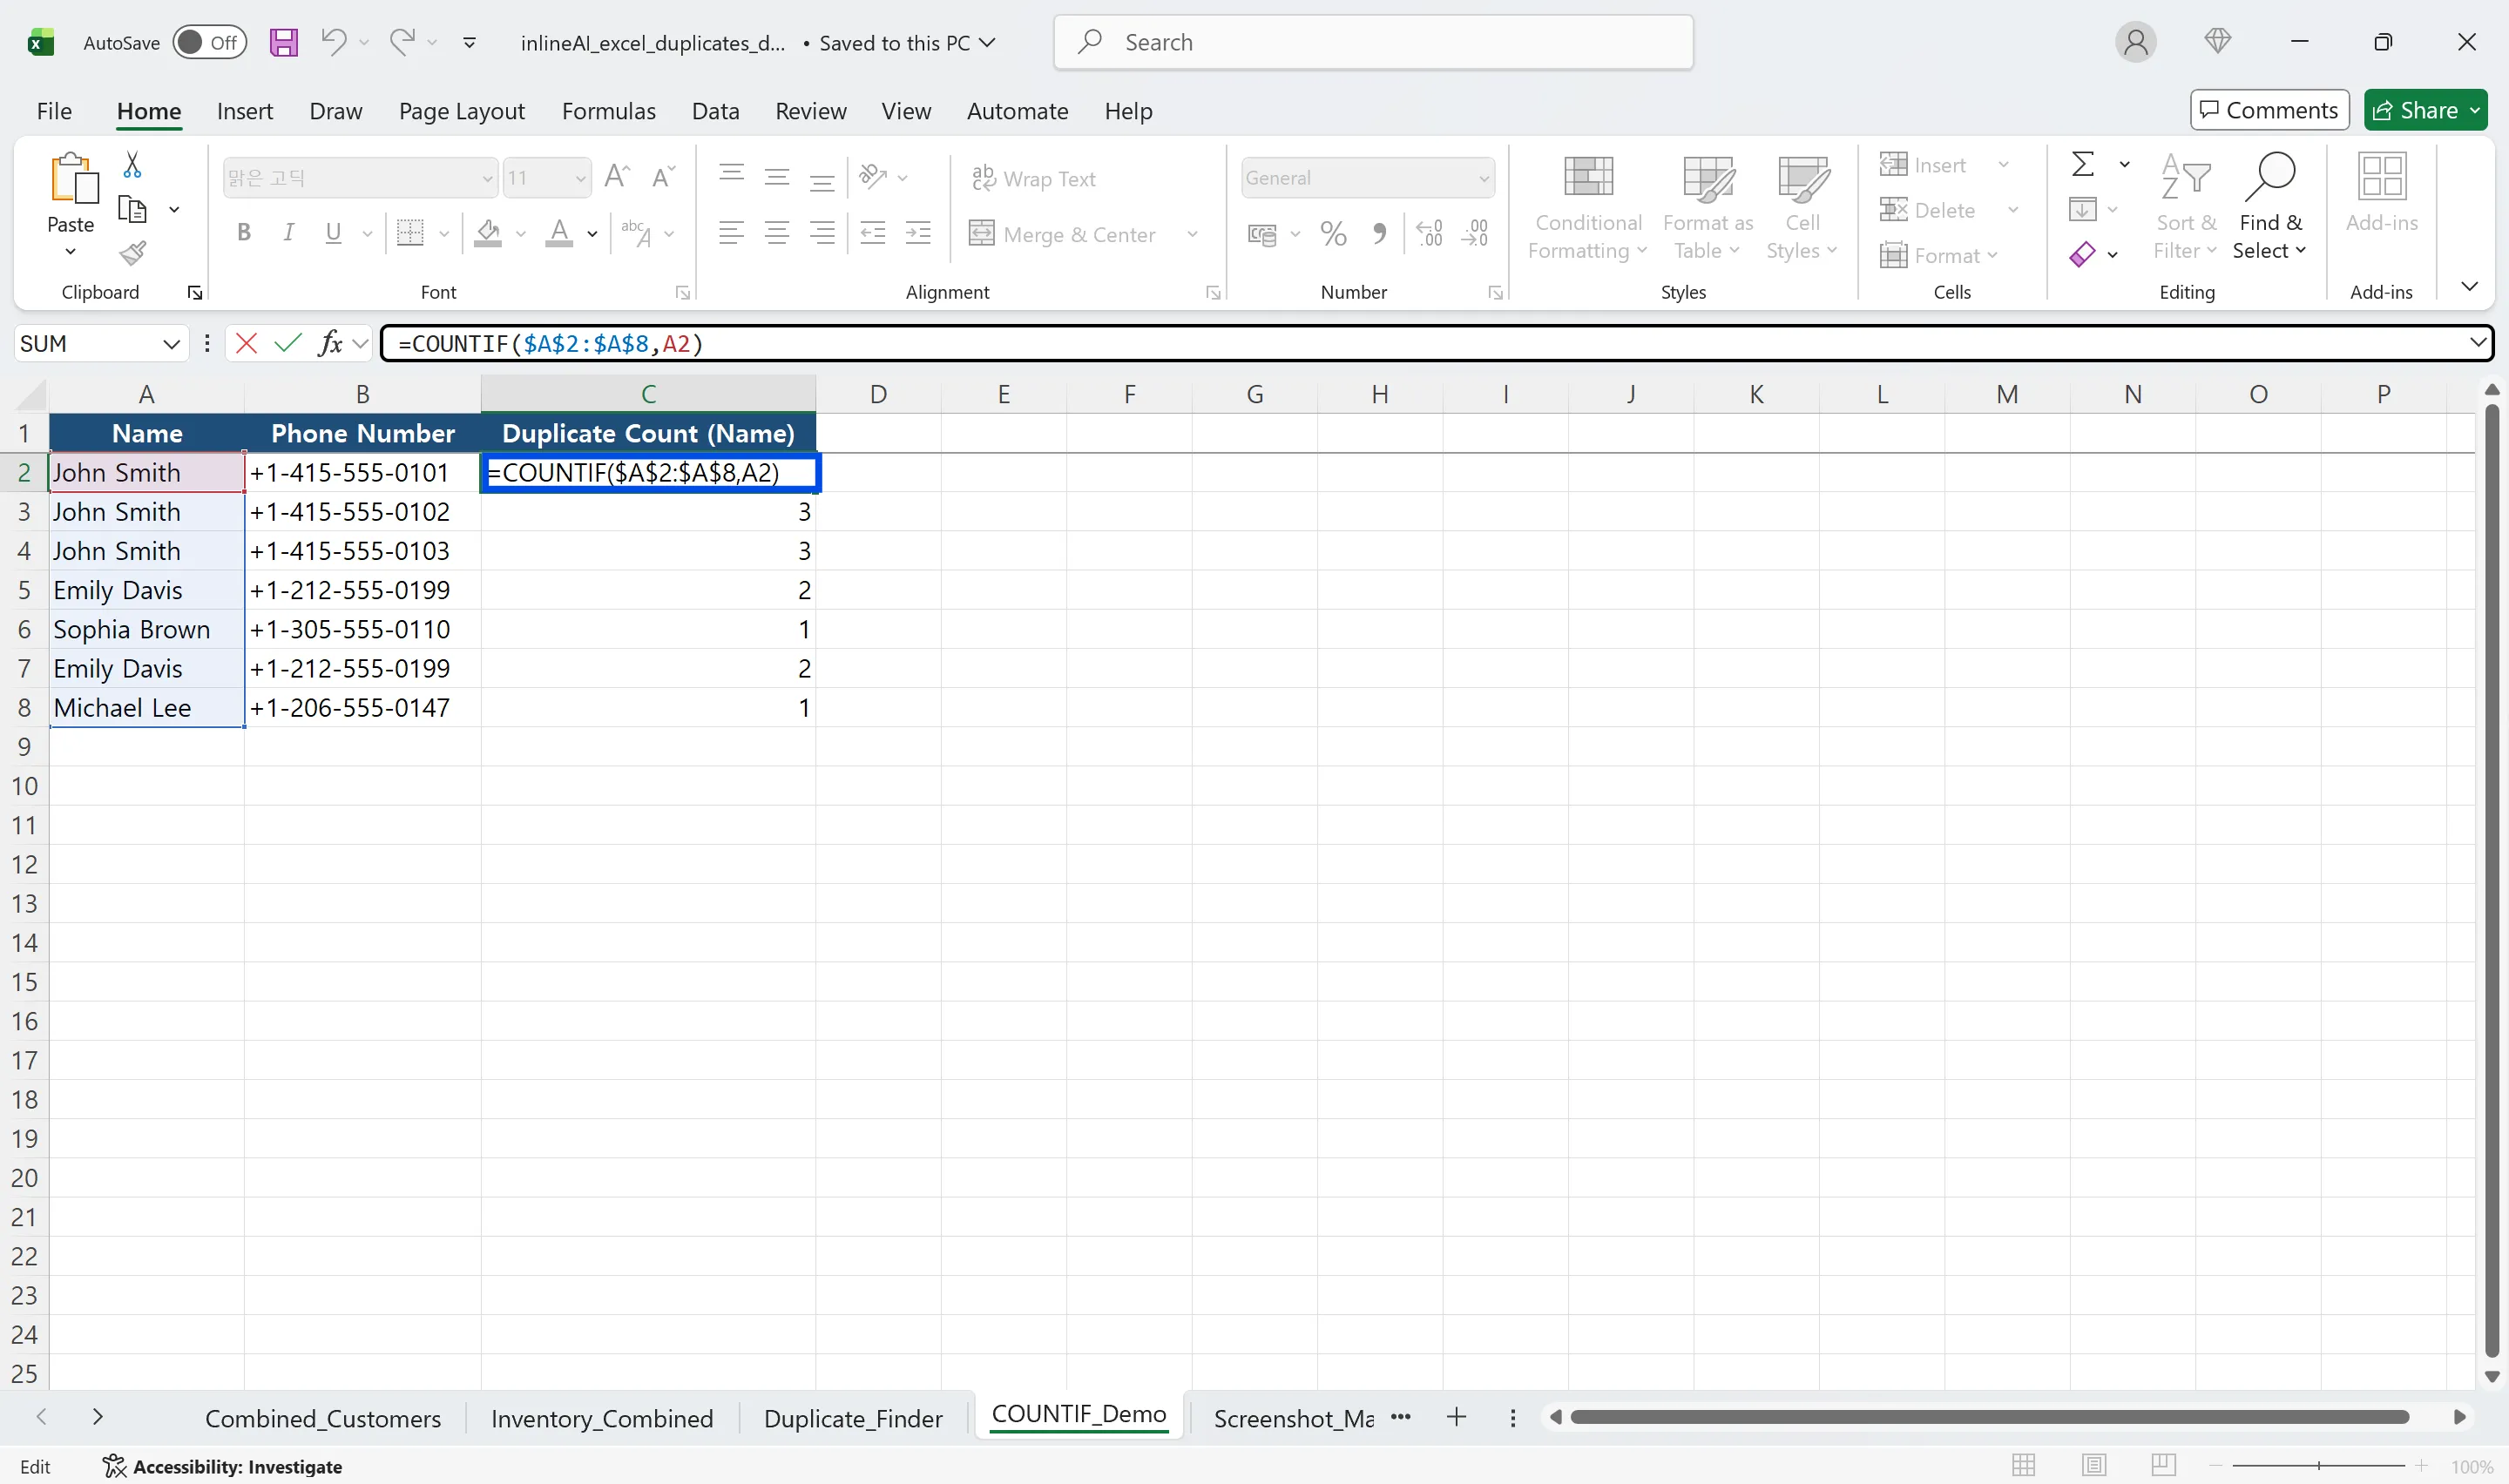
- Enter an Excel function like =COUNTIF(D$3:D$16, D3) in the column where you want to display duplicate counts.
- Specify the first argument as the entire data range using absolute reference. Using dollar signs like $D$3:$D$16 fixes the range even when copying the formula.
- Specify the second argument as the first cell to compare using relative reference. Entering it without dollar signs like D3 automatically changes to D4, D5 when copying the formula down.
- Copy the formula down and each row will display how many times that value appears in the entire range.
Using Duplicate Count Results
If the COUNTIF Excel formula result is 2 or higher, it's duplicate data. Applying a filter based on this count allows you to separately verify or delete only duplicates.
For example, a count result of 3 means that value appears three times in the entire dataset.
The Excel duplicate count method is especially useful when analyzing which data is duplicated and how frequently before removing duplicates.
You can combine COUNTIF with Conditional Formatting to see duplicates both numerically and visually.
Frequently Asked Questions (FAQ)
Q. Can I restore data after removing duplicates in Excel?
A. Duplicate removal executes immediately and Ctrl+Z may partially restore it, but not perfectly. It's safe to copy the original sheet before working.
Q. What's the difference between Conditional Formatting and Remove Duplicates?
A. Conditional Formatting only displays duplicates with color and keeps the data. Remove Duplicates actually deletes the data.
Q. How do I remove duplicates based on multiple columns in Excel?
A. Check all columns that should be criteria in the Remove Duplicates dialog box. Only rows where all columns match completely are recognized as duplicates.
Q. How can I use duplicate count results?
A. If the COUNTIF function result is 1, it's a unique value; 2 or higher means it's a duplicate. You can easily manage duplicate data by filtering or sorting with these numbers.

Work Smarter with Excel Using Cicely AI
Removing duplicates safely often requires more than clicking one button. You need to choose the right criteria, verify results, and avoid deleting important records.
Cicely AI is a desktop-native AI coworker designed for spreadsheet workflows. Instead of manually checking which columns to use as criteria, you can simply tell Cicely:
"Remove duplicates only when both Name and Email match."
Cicely analyzes your worksheet structure and guides you through the correct setup. Everything runs locally on your PC. No uploading. No copy-pasting into external tools.
From duplicate cleanup to advanced filtering and formula generation, Cicely AI helps you manage data confidently without second-guessing your settings.